
Kitchen Reorganization Series: Refrigerator
Terror is an excellent motivator. For Apartment Therapy’s The Kitchn blog’s photo tour of my bento kitchen, I panicked and did a sweeping overhaul of my cabinets, refrigerator and pantry before they came.

I don’t have “Before” photos this time around because the refrigerator was the absolute worst, messiest place in the whole kitchen and I couldn’t bear taking even one photo of the inside before cleaning for the cameras. Sorry! Just imagine stuff crammed in everywhere willy nilly, overpacked and unorganized to the naked eye. I’ve got pretty good recall so I mostly knew where everything was, but somehow my poor husband wasn’t able to read my mind to find things… The photo shoot was a good opportunity to get things in order using ideas from my Japanese-language kitchen organization books. Do you have any great tips for organizing your refrigerator or freezer? Let us know in comments! (Read on for details of the refrigerator and freezer reorganization, with feedback on what’s been working for me over the last few months and what hasn’t.)
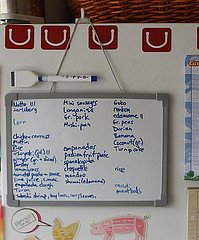 Freezer Door (outside): Starting on the outside of the fridge, on the left I have a small hanging whiteboard and magnetic whiteboard marker that are theoretically for tracking freezer inventory as I use and replace things. (Click on any photo for a larger view.)
Verdict:
- This works when I maintain it, but I go through phases of keeping it up to date and plain ignoring it. Unfortunately it’s only as good as the weakest link: me. Any food inventory system will help reduce food costs as it reduces waste and double-shopping, so I should be better about this.
- I initially got the little hanging board from Daiso discount store as it had a magnetic strip on the back. I figured I’d have lots of flexibility with where to put it, but unfortunately the magnetic strip is too weak to keep it up anywhere (let alone write on it!). There was a cord on the back, though, so I was able to put it up with a magnetic hook that sticks on top of the freezer door.
Verdict: I use these ALL the time. Big thumbs up as I can actually stay on top of the upkeep.
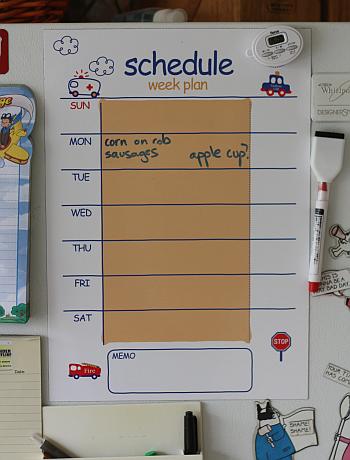
Here’s another cool whiteboard planner that I would use all the time if I were a better person. It’s a flexible magnetic whiteboard sheet that I picked up reasonably from Daiso, with the days of the week on it. I’ve got a similar sheet downstairs on the lid of the chest freezer to track inventory, but it came totally blank without days or columns. Sometimes I use the weekday sheet to roughly sketch out what sort of leftovers are in the fridge that need using up, and ideas for the next day’s bento. (See the Laptop Lunch planning worksheet for something similar.)
Verdict:
- Like any inventory system, it’s only as good as the data — sometimes I use it, other times not, which kind of defeats the purpose (yeah, I’m lazy). When I do use it to track our leftovers and plan bento lunches, it’s excellent for knowing what needs using up quickly, without wasting energy by opening the refrigerator door and just standing in front of it.
- I’m finding that the flexible magnetic sheets are harder to erase with regular whiteboard erasers than the hard ones. Either use dry erase board cleaner (expensive) or a regular old wet wipe (cheap) to clean marker residue from the sheets. Extra tip for parents: rubbing alcohol removes Sharpie marker scrawls from the refrigerator door. Ask me how I had to figure that one out…
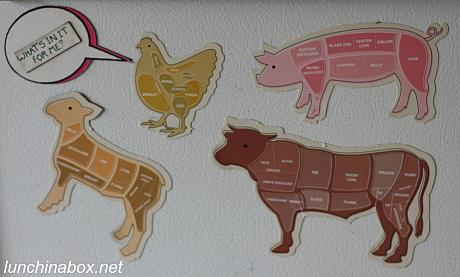
A little bit of educational whimsy — some paper-thin butchery magnets from Alton Brown’s book I’m Just Here for the Food. There used to be an egg magnet that went with the chicken, but Bug did something with it (d’oh!). I added the chicken’s editorial comment from an old set of Dilbert magnets.
Verdict: Thumbs up! I never could keep cuts of meat straight in my head; it’s convenient to have reference material front and center as playful magnets on the freezer.
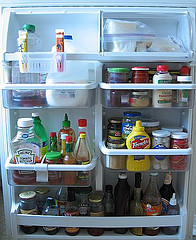
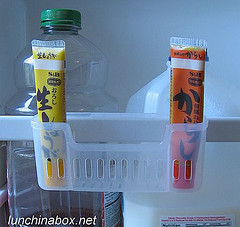
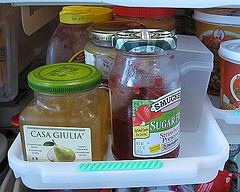
Refrigerator Door: This area is pretty standard, with the exception of a neat little condiment holder (from Daiso or Ichiban Kan discount stores) that clips onto the side of the milk/juice area. It’s the perfect size for little tubes of wasabi, ground ginger, or karashi spicy mustard, or even pre-filled sauce containers. My Japanese freezing books also show photos of people using regular old binder clips on the door to hold these little tubes, making me think I could try that out for tubes of tomato paste. Think about what you use most often and need to have easy access to, then experiment with different ways of organizing.
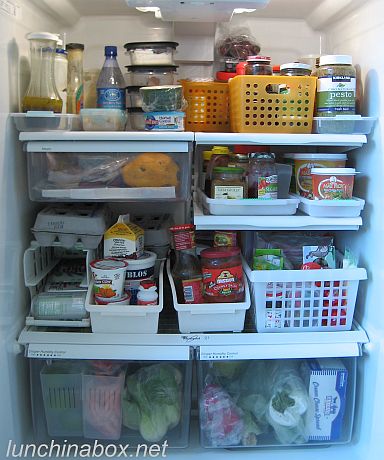
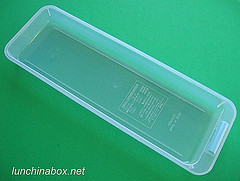
Main refrigerator: Here’s the main refrigerator area, packed to the gills with STUFF. You can see my organizational problem: I’m a total packrat with staples for many different cuisines. Life would be easier if I focused on one or two cuisines instead of bopping around the map, but there you go. I used a combination of long refrigerator trays (shown at right, available for US$1 to $1.50 at Ichiban Kan and Daiso), organizing baskets, and a common soda can organizer. I get a lot of things from Ichiban Kan; check out their online store for cheap kitchen organizing products, plastic baskets, storage boxes, etc. (Disclaimer: I have no commercial affiliations with Ichiban Kan or Daiso.)
The top shelf (left to right) holds a long tray of salad dressings, orange baskets of condiments and jarred staples, and another narrow tray of pasta sauces. My organizing books also show a thrifty alternative of using the bottom of washed milk cartons to store small items in the fridge.
Verdict: So-so. I found that there wasn’t enough space or flexibility on the top shelf to accommodate the regular shopping or leftovers we generate. I’ve since revamped the top shelf, clearing out some of the baskets and trays to create more open space.
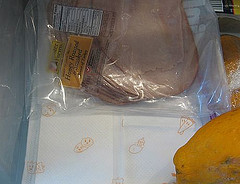
On the second shelf, I lined the meat compartment with absorbent refrigerator paper to catch any drippings from defrosting meat, reducing chances of contamination and making cleanup easier. (A layer of paper towels is a cheap alternative.) To the right of the meat compartment is a tray of toast spreads (jams, natural peanut butter, etc.) that I can quickly pull out at breakfast and put on the table. On the far right is a narrow tray with a variety of Thai curry pastes, a regular weeknight meal in our house (see my Thai curry master recipe).
Verdict: Thumbs up! Haven’t had any leakage issues in the meat compartment yet, but it’s probably just a matter of time. The toast spread tray is probably my favorite part of the refrigerator reorganization: no more rooting around with the fridge door open, looking for all of the different jams, jellies and toast spreads at breakfast time. Speed up!
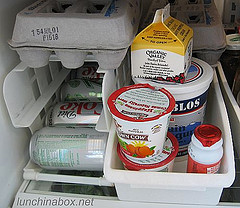
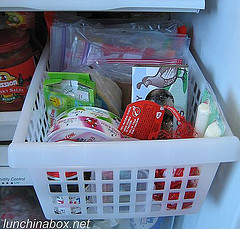
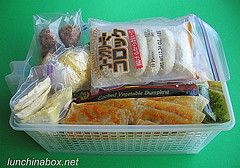
 Left to right, the bottom shelf holds a can organizer for sodas (providing a nice shelf for an egg carton), a wider/taller refrigerator tray with yogurt, another wide tray with salsas, and the bento basket filled with handy items for packed lunches (wrapped cheeses, quail eggs, inarizushi wrappers, dumpling wrappers, and a container of pre-filled sauce containers for speed). So when I open the refrigerator in the morning and wonder blankly what to pack, I’ve got a handy fall-back basket full of options.
I keep my little pre-filled sauce containers with ketchup and other perishable sauces in a little lidded container in the bento basket for easy access. These are the same little containers that my friend Virginia swears by for her forgetful kids, to help them remember to bring back everything from school. For additional ideas, see my longer post on getting back lunch gear.
Verdict: Not bad. The baskets in the front pull out pretty easily to reveal a line of seldom-used jars in the very back. Much better than before, when I’d just to root around clumsily and usually forget about anything that wasn’t right in front.

The vegetable crisper on the left holds hard fruits and vegetables in a cool produce organizer I picked up from Daiso. The middle dividers are adjustable and removable, and there’s a little horizontal separator that balances inside for added flexibility.
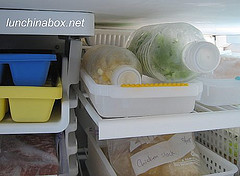
Freezer Door: Here’s the freezer door with small containers of frozen rice, ice packs, spices, and cooking odds and ends like tomato paste or lime juice (frozen in ice cube trays). In general, the freezer door should hold things that can stand up to repeated temperature fluctuations due to opening the door. Ice packs and spices are fine, but I should probably move the frozen rice deeper inside the main freezer.
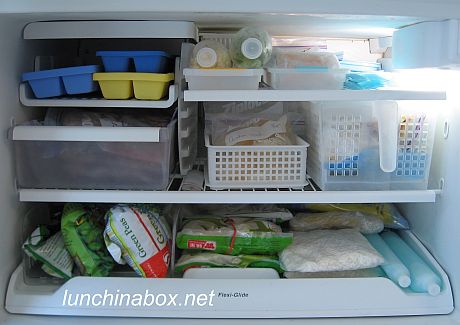
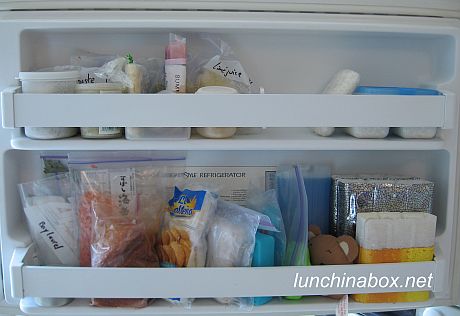
Main Freezer: Even though I have a big chest freezer downstairs to store my cheap bulk purchases, the upstairs freezer was still jam-packed with food and ice packs that tended to fall out when my husband rummaged around. When one landed on Bug I knew it was time to get things in hand (even prior to the Apartment Therapy photo shoot).
I moved excess food downstairs to the chest freezer, and used a combination of baskets, long trays, and bookends to put the upstairs freezer in some semblance of order. It’s not perfect, but it’s okay. The wide Flexi-Glide tray on the very bottom pulls all the way out, so no need to use separate baskets on the bottom shelf as long as things aren’t piled so high that they catch when the tray is pulled out. It’s not as neat as the super-organized freezers I see in my Japanese freezing books or anything, but it gets the job done. I got the expandable bookend-style freezer organizer from Daiso.
The regular shelves have baskets and trays so that I can pull things out from the back and sort through them on the counter with the freezer door closed — saves time and electricity. The big basket on the middle right is full of frozen bento staples (see my earlier post on bento baskets for the freezer), and the other trays are full of homemade stock, meats/fish/sausages, sliced cheese and plastic bottles with chopped green onions and corn.
Verdict: So-so. I’ve since swapped out the small-mouth plastic bottles for wide-mouth bottles to make it easier to shake out the green onions and corn. After watching a recent episode of Alton Brown’s Good Eats on freezing, I’m now a little more lukewarm on using the plastic bottles for freezing, as exposure to air encourages freezer burn. I may go back to freezer bags or little freezer containers lined with paper towels to reduce the air.
FURTHER READING:


Recent Comments
FAQ
Richard Malakuskie | The Nerdie Birdie | Shaking up the Lunch Routine: Popcorn with Toppings - Popcorn Blog | Justin Wright | The White Plate Kitchen |
Oshibori: We don’t need no stinking wet wipes!Daniel |
Homemade gnocchi box lunches (22)Lisa |
Guide to choosing the right size bento box (82)Julie |
Confessions of an ostrichBernice |
Top Tips (4)miamidish.net | Cheap Seat Eats |
How to make Spam Musubi (69)Scratching Ramen |
Speed Bento: leftover storage and portion guidelinesAdverbios de tiempo |
Fried Shrimp Bentos: Simple vs. Fancy (43)Mimi |
Fruit cup jello jigglers in everyday containers (42)Madison Moms Blog |
Limited edition “Bento Sensei” shirts for J-POP (2)runeanimer |