
Recipe: Fried Shrimp Sushi Rolls
Making inside-out sushi rolls doesn’t have to be all that involved if you’ve got the basic materials and some plastic wrap on hand. Serve plain or decorated like fish to thrill your child (or your inner child), like I did with Bug’s bento lunch for Children’s Day. You can speed this up by using frozen fried shrimp and frozen rice, but a step-by-step recipe for making inside-out shrimp sushi rolls from scratch follows below.
Fried Shrimp Sushi Rolls
(adapted from the Japanese-language cookbook Okosama Lunch to Obento “Children’s Lunches and Bentos”)
For the fried shrimp:
- a few shrimp, shelled but tail on
- flour
- salt & pepper to taste
- 1 egg, beaten
- 1/2 cup panko Japanese bread crumbs (or regular Western breadcrumbs)
- vegetable oil for deep frying
- (special equipment: toothpicks or bamboo skewers, small pot for deep-frying)
For the rolls:
- one large piece of nori (roasted seaweed for sushi), cut in half
- one cup of cooked rice (short- or medium-grain)
- 1 Tb of aonori (seaweed) or 2 Tb of green-colored furikake (flavored sprinkles for rice)
- 1 Tb of sakura denbu or 2 Tb of pink- or orange-colored furikake (flavored sprinkles for rice)
- (special equipment: 1 sheet of plastic wrap or a “makisu” sushi rolling mat)
For the roll decoration:
- 1 quail egg, hard boiled and peeled (or substitute a regular chicken egg, sliced white cheese, kamaboko fish cake, etc.)
- small piece of nori (roasted seaweed) for the eyes and gills
- 4 slices of cooked zucchini (or substitute raw cucumber)
- 4 slices of cooked carrot
- mayonnaise for affixing edible decorations
- (special equipment: sharp scissors for cutting the nori shapes)
If you have frozen tempura shrimp, you can use that as a shortcut. If not, you’ll need to make your own fried shrimp from scratch.
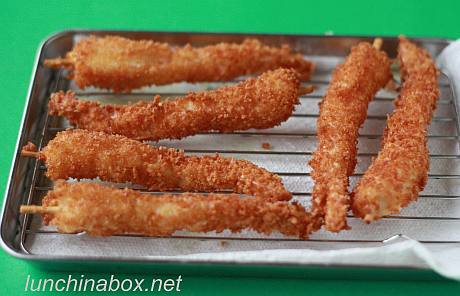
For the fried shrimp:
1. Pat the shrimp dry and insert a toothpick or skewer down the middle lengthwise. If using long skewers, use kitchen scissors to snip off the excess skewer. This keeps the shrimp straight and prevents them from curling up during frying.
2. In three separate shallow dishes or pans, set up your breading station: mix together flour/salt/pepper in the first dish, beaten egg in the second, and panko bread crumbs in the third.
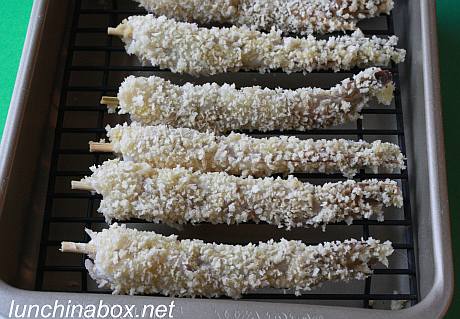
3. Dip the shrimp in the flour mixture, tapping off excess. Then dip the shrimp in the beaten egg, then the bread crumbs, letting the excess fall off. Place on a rack while you finish breading the rest.
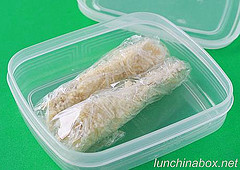
4. (If you want to save the shrimp for future speedy bento lunch prep, the breaded shrimp can be wrapped and frozen at this point. Just quick-fry them while frozen when you’re looking for a little extra something in a lunch.)
5. Heat enough vegetable oil in the pot for deep frying until it reaches 350 degrees F (180 degrees C). Fry the shrimp a few at a time until golden brown, about 2-3 minutes. Remove to a cooling rack lined with paper towels to drain. Once cool, carefully remove the toothpicks or bamboo skewers from the shrimp so you don’t have an unpleasant surprise when eating!
For the sushi rolls:
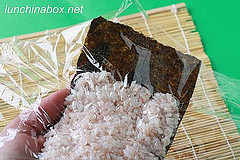
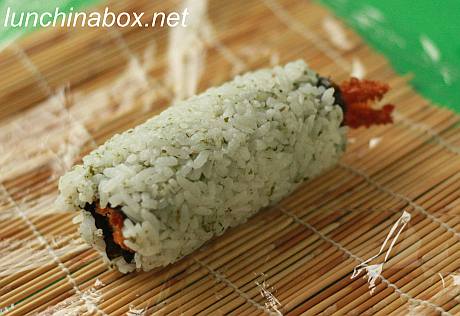
6. Split the cooked rice into separate bowls, stirring the aonori (or green furikake) into one and the sakura-denbu (or pink/orange furikake) into the other. Take a half-sheet of roasted nori seaweed and spread a thin layer of the colored rice on top. I left a small strip of nori without rice in the photo, but wound up trimming it off in the finished product.
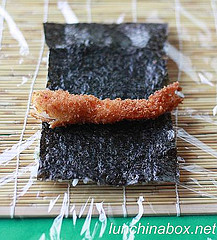
7. Take a piece of plastic wrap and place the rice/nori rice-side down on the plastic wrap to enable the inside-out rolling without having rice stick everywhere.
8. Place the plastic-wrap side down on the rolling mat or the counter, and place one of the fried shrimp on the nori side. (If you have a makisu bamboo rolling mat, use this to help roll the shrimp inside of the nori and rice. If you don’t have a special rolling mat, just use the plastic wrap.)
9. Using steady, even pressure, roll the shrimp inside of the nori, simultaneously peeling away the plastic wrap from the far end when it’s in danger of being rolled up into the nori.
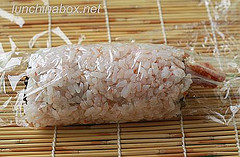
10. At this point, you can either use the rolls as is or further decorate them to look like fish. To serve as is, remove the plastic wrap from the outside and you’ve got the basic inside-out sushi roll.
To decorate the rolls:
11. While the roll is still wrapped in plastic wrap, dip a sharp knife in water and cut off the very end of the rolls. This gives a flat, straight end to the roll that forms the “fish face”. (What to do with the leftover food scraps? Either eat it as a snack or pack it up in the bento under other food.)

12. Remove the plastic wrap from the sushi roll and place the roll in your bento box, ready for decoration.
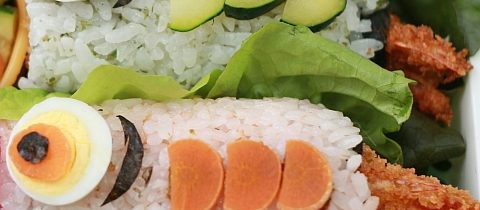
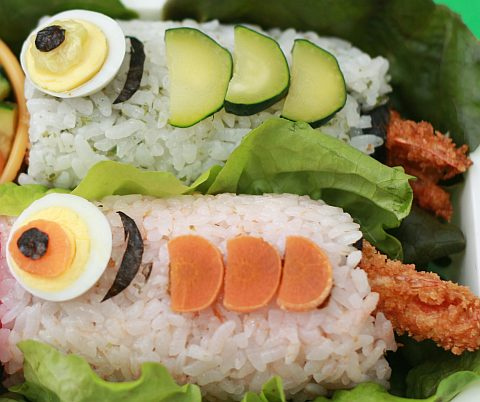
13. To form the scales: Cook the sliced carrots and zucchini either on the stovetop or in the microwave. (I used my microwave mini steamer from Daiso to cook both in under a minute, but you could simmer or saute them as you like.) Cut off about a quarter from the side of each slice of carrot/zucchini to form “fish scales”, and place three on each roll. I used a little dab of Gohan Desu Yo! seaweed paste to help the veggies stick to the rice.
14. Fold a small piece of spare nori in half, and use sharp scissors to cut out two crescent-shaped slivers (for “gills”) and two small circles (for “eyes”).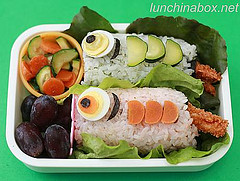
15. Cut the hard-boiled quail egg into slices, and pick out two slices that show the most yellow yolk. Place these on the roll to form “eyes”, using a little dab of mayonnaise (or seaweed paste, cream cheese, etc.) to help affix to the rice. If using a regular chicken egg, use the two smallest slices of egg white from each end to form the “eyes”. (Other white-colored substitutes for eyes could include sliced cheese, kamaboko fish cake, etc. What else would work? Let us know in comments!). Place a nori “gill” just behind each “eye”. The moisture of the rice should keep the dry nori affixed.
16. Cut the remaining carrot and zucchini slices into little circles a little smaller than the egg “eye”, and affix to the egg yolk with a dab of mayonnaise. Place the smallest nori circles on top of those to complete the “eye.”
FURTHER READING:


